The post The white loaf that will make you proud appeared first on Miss Foodwise.
]]>
The power of an image.
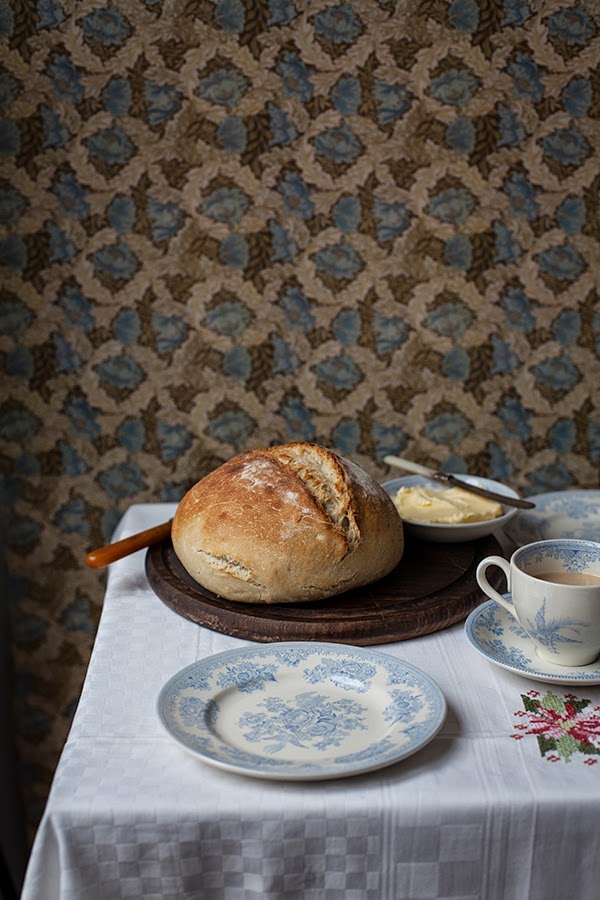
I posted a picture on Instagram and Facebook of two loaves of bread I baked on wednesday. I was proud of them, they were beautiful, they were utterly perfect to me.
I had scored the bread this time with little hesitation and fear it would ruin my loaf, and while it was baking in the oven, I watched trough the oven window in true British Bake Off style how my score cracked open and baked into my most proud bake in my life.
Slightly embarrassed by my pride and joy I mentioned that to you the bread might seem plain, but to me they were special. The answer came in the form of that image becoming the most ever likes picture on my facebook and my instagram feed. You loved it too.
So much that you emailed me for the recipe, to go home and bake these loaves yourself, to see it rise, and bake and fill the house with the smell only bread is capable to induce…
Utter joy.
Bread has been a staple since the beginning of time, it evolved from a flat, dense gritty loaf to the small bun sized wheat loaves of the Saxon monks. Wheat and bread was so valuable that often food rents consisted partly of loaves or grain. Wheat and barley would be planted together so if one harvest failed, the barley which was a hardier grain would survive and save the people from the starvation that was luring behind every tree and every sheaf of corn. But harvest failed plenty of times and so bread was made from dried peas and beans. This must have been an very heavy and unpleasant bread but it would provide plenty of nutrition during shortages. Windmills and communal bread ovens can be found in the Domesday book but as they were owned by the manor or monastery, they were not free to use. A portion of the grain or bread dough had to be payed for the use of the mill and oven, therefore the peasants continued to mill the grain themselves using a hand quern that must have taken many long hours of hard labour to end up with a small portion of flour.
People must have suffered from acute toothache with the amount of grit in the bread. Even the upper classes preferred to soak their bread in their all important sauce and have their meat so succulent that it fell of the bone. Chewing would have been difficult if you would have lost most your teeth in your early adulthood.
Bread remains a staple food in the centuries following the Norman conquest and the Middle Ages, but recipes for breadmaking remain unknown from that period except for a mention of the process of bread making in a poem.

Although today bread still remains the most popular base of our diet, it has also become a source of worry with gluten and wheat intolerances becoming nearly as frequent as famine was in ancient times. Although bread has been a staple food for centuries, in the early years it was labour intensive to mill the grain by hand so bread would not have been the thing to fill up the bellies of the poor. They would have had a modest piece of bread, with their pottage, or a piece of cheese but not as plenty as we often have it today.
Wheat has also been modified to an extent that it is easier to harvest, but the quality is less. The need to have everything fast and plenty changed the way we create bread, with added chemicals to make is rise in a fraction of the time if would actually need to break down the enzymes in the grain which make it harder to digest. There is talk of a modern day ‘bread belly’ with people suffering from the effects from fast factory made bread which has little resemblance to the real bread of our ancestors. In my opinion the modern everlasting, spongy bread, sometimes dyed with malts or molasses to make it appear as a wholewheat loaf while it is not, is a new kind of poverty, the poverty of quality of the most basic of foods. Our daily bread.
So
here is my recipe, which I just in true honesty came up with by winging
it. It’s quite the recipe for a plain white loaf, but strangely enough
it came out differently than before. I added a spoon of my precious 1
year old organic wholemeal spelt sourdough starter, and a drizzle of
good English rapeseed oil. Other than that of course, (I always use)
Cornish sea salt, organic strong white bread flour and water which I
first boiled and let cool to tepid before adding organic dried yeast.
To make two 700-800 g loaves
What do you need
- 1 kg of organic strong bread flour, stone ground if you can obtain it, is the best
- 700 ml of tepid water
- 2 heaped tsp of dried yeast
- 20 g of seasalt flakes, not the over processed, white powder kind please
- 1 generous tablespoon of sourdough starter if you have some
- 1 teaspoon of rapeseed oil, or olive oil
Method
Turn on your oven on the lowest setting to just make it nice and warm, then turn off.
Boil water and let it cool until blood heat (tepid is fine) before adding the yeast
In a large bowl or soup pot add the flour and make a well.
Drizzle in your oil, salt and sourdough on the edges without letting them touch eachother.
When you have mixed your yeast with your water start adding it to the well and make a turning movement with a couple of fingers or the back of a wooden spoon to gradually mix the flour with the water and yeast.
Keep on doing this until you get a well mixed dough, now either turn out the dough on a floured surface to knead or do as I do, leave in the bowl and use one hand to pull and twist and push your dough for about 15-20 minutes, constantly turning the dough so you have kneaded it well and the dough is nice and springy. It really is very important to work the dough well.
Now put a shower cap over the bowl to keep the dough from drying out.
Place in your warm oven – please make sure it is not too hot, just like a nice warm summers day – and leave your dough there for an hour or until doubled in size.
I feel my dough rises much better when I do this, I live in a very cool house which is never warm enough to give your dough that cosy feel it needs to feel happy and rise.
After your dough has risen for 30 min to 1 hour, take it out of the oven gently and turn it on to full heat. Mine is 250° C. Also place a baking tray in the oven to heat.
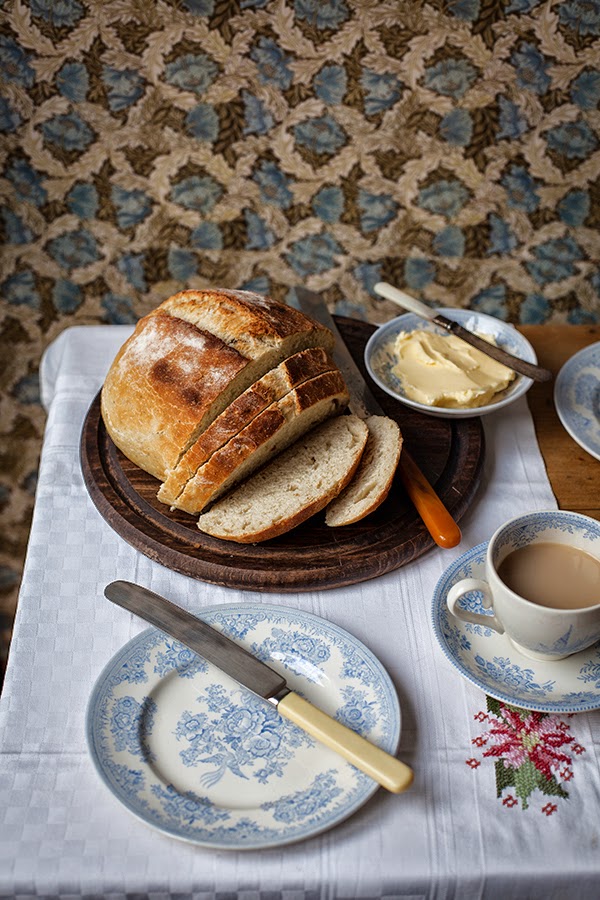
When your oven has preheated knock the dough back by simply removing it from the bowl onto the floured work surface where you can divide and shape it in two for two loaves, or in four long stretches to get a ciabatta style bread, by that I mean one that is perfect for dunking in soup, to serve with cured meats and cheese and so on.
Dust the tops of your loaves with flour and just before you place them on the heated baking tray, score the bread with a very, very sharp knife about 1 cm deep. A stanley style knife works best, other knives are often not sharp enough, and not thin enough to make that all important score.
Place in the middle of your oven, on the heated tray, and chuck a bit of cold water on the bottom of the oven to create steam
Bake for 10 min on full blast
After 10 min turn down to 220°C and leave for 20-25 minutes.
These loaves freeze perfectly, when you need them, defrost in a kitchen towel the evening before and preheat your oven to full blast, place a ramekin with water into the oven with the bread and bake for 5-10 minutes.
Fresh home made bread in 5-10 minutes, epic. Just think ahead and always make two loaves instead of one. 1 kg of flour is also easier to work with that 500 g of flour.
Enjoy and if you bake this bread, show me a pic! I love it when you send me your pictures of your creations!
You might also like
Soda bread, a loaf in 45 minutes
What’s your favourite bread recipe?
Don’t forget to leave a comment!
The post The white loaf that will make you proud appeared first on Miss Foodwise.
]]>The post Sweet Cheese Curd Tarts and the Road to a Book appeared first on Miss Foodwise.
]]>
Those who follow my instagram already know that I have been working on my very own book the last few months. (There is even a # hash tag on it to follow some of the process, I know, how very modern of me.) It is a scary yet exciting journey, one with occasional bumps in the road and one with smooth pathways. I thought it would be easy, I couldn’t be more wrong.
I am fortunate that my publisher was super excited about me to design the book myself and photograph it, which isn’t a given thing. They gave me the freedom to come up with a concept no matter how crazy it sounded. They wanted the book to be ‘totally me’. This was always something that was made up in my mind. If the book would be designed by someone else and photographed by someone else, it would not be my book. I would not want that book. This isn’t a narcissistic urge to just get ‘a‘ book out there, this is an artistic project for me. I have been a graphic designer my whole professional life, I have done numerous layouts for books, booklets and magazines. Not being allowed to design and layout my own book would just feel completely and utterly wrong. But of course, this means doing the work of 3 maybe 4 people all on my very own…
I will have to turn down future jobs to get be able to do this big book project but the book will by no means pay enough so I can pay my bills. All the money from the advance, the layout work and the photography will go to the actual creating of this book. But although I would have liked to at least have some tiny profit, I am also very happy that the subject of my book wasn’t chosen for me, and that I can really do what I want. I have had other offers from publishers, who had the subject of my book already decided for me, of course I had to turn them down. As I said, this is not just ‘a‘ book.
Because of the significance of this project, I often freeze and can’t write or cook or photograph. Being a creative creature means you constantly doubt your work, and push yourself and push and push. I ask myself constantly, is this perfect enough. In every word and image I put an enormous effort, the story I tell needs to be right, it needs to transport you. I am not shooting a book, I am creating images that will hopefully whisk you away to my imaginary English cottage with limestone walls and a cream colored coal fired Aga stove. I want you to smell the slightly burnt toast that has the flavour unmatched by any toaster because it has been toasted on that oh so coveted AGA coal fire.
When I freeze, it is the moment when I am in doubt. Doubt is your enemy.
You must not forget, I started my own business as a freelance photographer/graphic designer/writer in januari, which means I am not surrounded by colleagues anymore, I work alone, and often I will be abroad, alone in my B&B. There’s no ‘can we have a chat about the concept or designs’ like in the advertising agency I worked at. I have to ask myself if it is right, I have to be objective and not let my heart get too much involved in it.
Which is hard, because I am a very passionate person. There is hardly any grey in me, it is either good or bad. There is no ‘this will do’ in my book – literally and figuratively speaking.
I am writing about this because I know a few people in our little online food lovers community who are also working on a book or book proposal. Sometimes to read someone else saying it is not a walk in the park, helps you to be okay with it, if one a day you wake up and are overtaken by the fear this great project brings with it.
It happens to us all.
But also because I need your help, I need people who would like to be involved and test a recipe for me, or more if you’re up to it. Eternal gratitude to my recipe testers so please get in touch if you want to get cooking for me – my email is on my contact page.
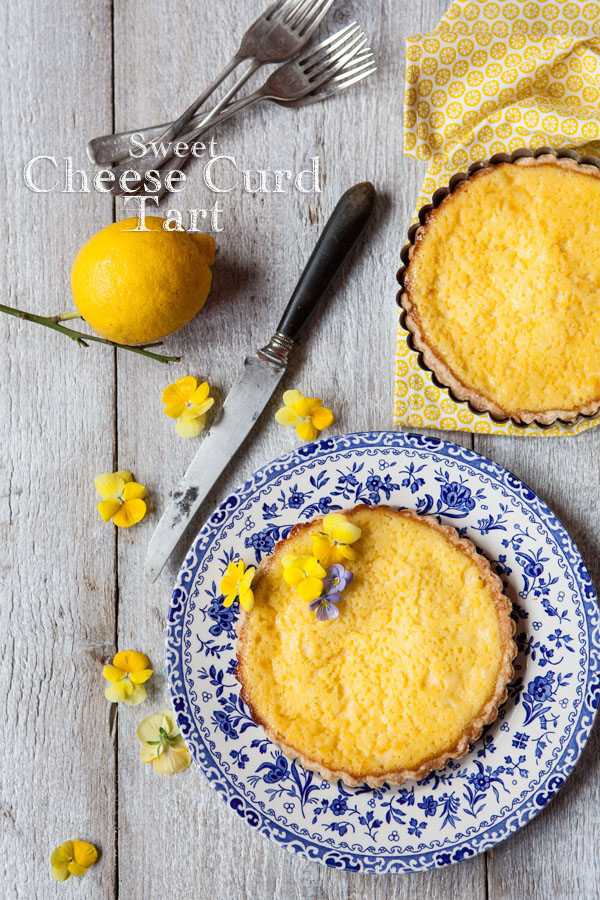
But on to that tart you see here, this is a sweet cheese curd tart with lemon. It is one of the recipes you just develop by accident, while trying to make something else you come up with an equally scrumptious dish.
Sweetened cheese curds have been used as a sweet treat on its own and in tarts for centuries, early recipes like this are the very first ancestors of the cheesecake we know today. Because I have used lard in the pastry, the tart has a sweet yet also savoury hint which is perfect for the likes of me who do not enjoy a very sweet treat.
What do you need (makes two 14 cm tarts)
Best is to start the day before you want to bake these tarts
pastry
- 250g plain flour
- 75 g butter
- 50 g lard
- 0,5 tsp baking powder
- 30 g sugar
- 1 egg yolk
- baking paper for blind baking
filling
- 300g cheese curds
- 2 eggs
- 100 g sugar
- 25 g melted butter
- 1 tsp of orange blossom water
- the zest of 1 lemon
Cheese curds
- 3l full fat preferably raw milk
- 2 tsp salt
- 2 tsp rennet (find it online)
- 4 tsp buttermilk or lemon juice
- a cheese cloth
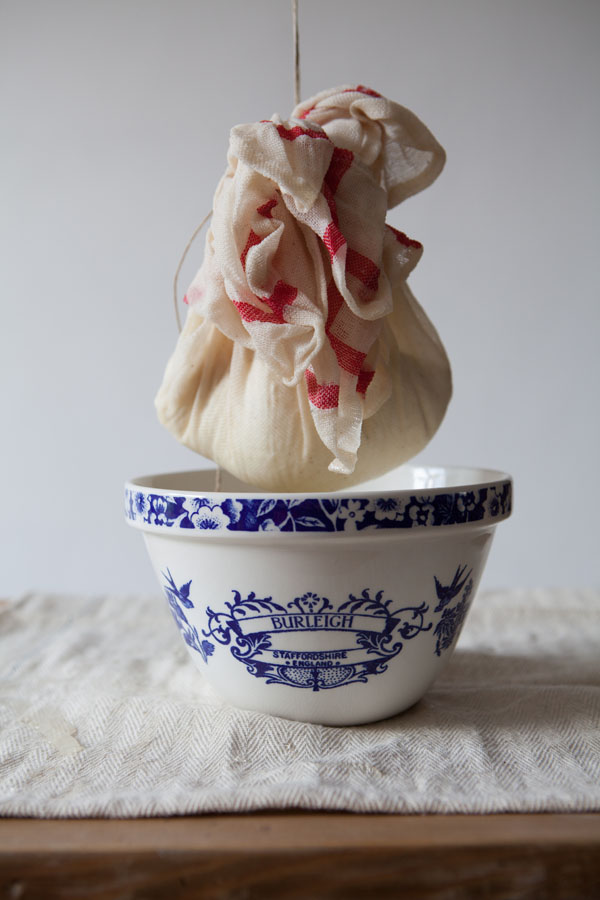
To make the cheese curds
heat 3 liters of full fat preferably raw milk to exactly 37 degrees Celcius.
add salt, rennet – you can buy it online and I used vegetarian and add buttermilk or lemon juice, butter milk works best
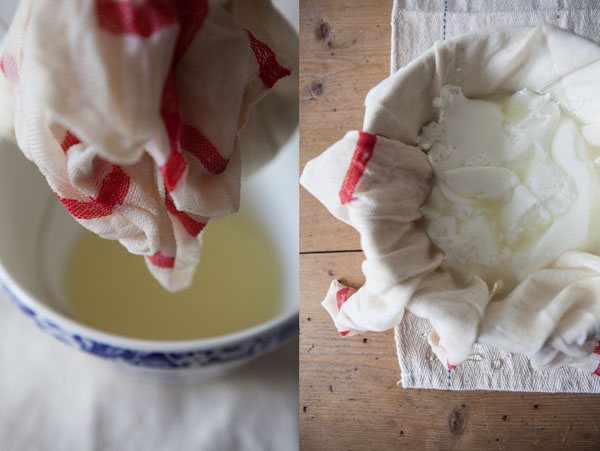
stir and leave to stand for 15 minutes – 30 minutes until the milk has separated from the whey. When the milk has separated from the whey, transfer the curdled milk to a bowl covered in cheese cloth. Drain the curds, leave them to hang for 3-5 hours
You might have some left after making the tarts, the cheese is good on its own, I like to salt it slightly and use in salads
The pastry
Mix the butter and lard into the flour with a round bladed knife, do this until you get a mixture that looks like breadcrumbs, add sugar and the egg yolk and bring the dough together. Be careful not to overwork the dough or it will get too chewy, place in the fridge to become firm. You can do this the day before too.
The filling
Put the curds into a clean bowl and tear them apart in smaller pieces, add the eggs, sugar, melted butter, orange blossom water and the lemon zest and leave to stand while you roll out your pastry.
Preheat your oven to 180°C
Roll out your pastry and place it in your tart tins, trim the edges and prick the bottom of the tart with a fork
Place baking paper over the pastry (make a round shape by folding the paper, so it fits better) and place baking beans or rice on top. Pop in the middle of the oven for 30 minutes or until golden in color
When the tart casings are ready, pour the curd mixture into each tart and pop in the oven until they bubble up nicely and become nice and yellow in color.
Serve as you will, I decorated mine with violets for this occasion.
Good with a glass of Whisky or Rum.
You might also enjoy
The tarts at Tudor court
Further reading
How writing a book is different than a blog / David Lebovitz on Dianne Jacob’s website
The post Sweet Cheese Curd Tarts and the Road to a Book appeared first on Miss Foodwise.
]]>The post George, the Dragon and the Cottage pie appeared first on Miss Foodwise.
]]>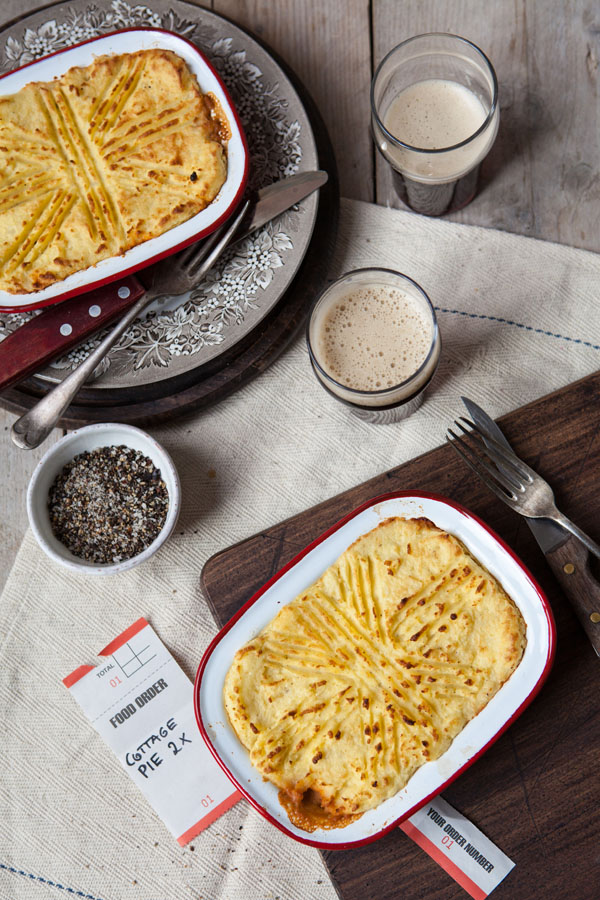
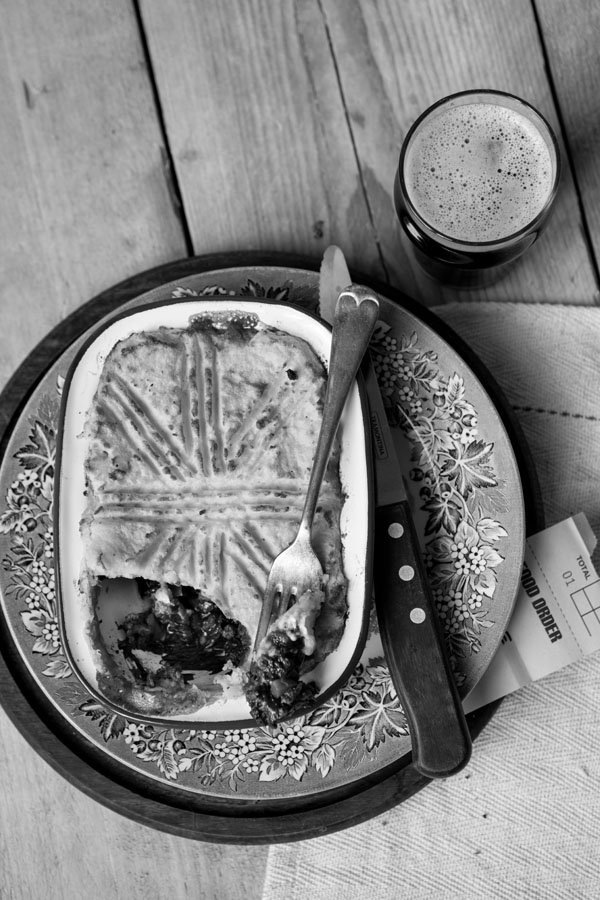
Wishing you all a happy Saint George’s Day with these humble cottage pies. I’ve been mostly working on my book, stuck with my nose in research and absolutely loving it but in the evening I long for great simple food with pure flavours. This pie is just that, with the best spuds you can find for your mash, decent flavoursome beef and a layer of moist spinach, this is a treat for me. I just wrap it in a towel and relax with a beer and a movie.
No doubt you will all have been waiting for the dragon slaying moment in this story but unfortunately I will have to disappoint you as there are no dragons in this tale.
Then the tale of George and the dragon appears in the Legenda sanctorum or Golden legend, a collection of hagiographies (stories of the Saints) by Jacobus de Voragine. This book of which there were over a thousand of manuscripts in the 13th century was very popular and was one of the first books that were printed in the English language when printing was invented around 1450.
So what are you up to today?
- 400 g beef mince, from chuck steak
- 1 large chestnut mushroom or a white one
- 1 stalk of celery
- 1 small carrot
- 1 clove of garlic
- a knob of butter to fry the meat and veg
- 1 small tin of tomato puree 50-70 gr (concentrate of tomato)
- 1 glass of red wine or stout beer like guinness – 250 ml
- 2 teaspoons of Worcester sauce
- 300 ml of beef or vegetable stock (I use an organic vegetable stock cube)
- Salt and pepper to taste
- A few handfuls of fresh spinach (you can use from your freezer too)
- Potato mash, you need 4 large spuds or use leftover if you have some
- Add 4 teaspoons of grated cheddar cheese
- 2 individual trays, or one larger one. Small pie pans work well. (14×19)
Method
Cook your spuds and make your mash with milk, butter, nutmeg and salt. If you like to make it richer, add an egg yolk too. You need a silky smooth mash which is slightly wetter than you’d eat it normally as it dries a bit in the oven.
Chop all the vegetables and add to a heavy based casserole, glaze a little over a medium flame and then add the meat. Brown the meat and add the tomato puree, stir well to combine evenly
When the tomato starts to caramelise – which means stick to the bottom of the pan, pour in the wine or beer. Stir to loosen up the meat and veg.
Let the booze evaporate, it takes about a minute, and it will be reduced a lot. If you don’t want to use alcohol, use water or stock
Now pour in the garlic, stock, and the Worcester sauce and put on the lid, leave for 30 minutes but check on it frequently so it doesn’t burn to the base. You may leave it longer too, it is merely for the flavours to develop.
Use boiling water from the kettle and blanch your spinach, drain and add a cube of butter, you may omit this but butter does taste so very well.
Preheat your oven to 180°C
Place your spinach in your chosen baking tray or trays, season with pepper.
When the meat is ready, transfer it to you tray or trays.
Now make the mash layer by scooping blobs of potato on the meat, then spread out.
You can pipe this mash, but who has the time to pipe mash on a weekday??
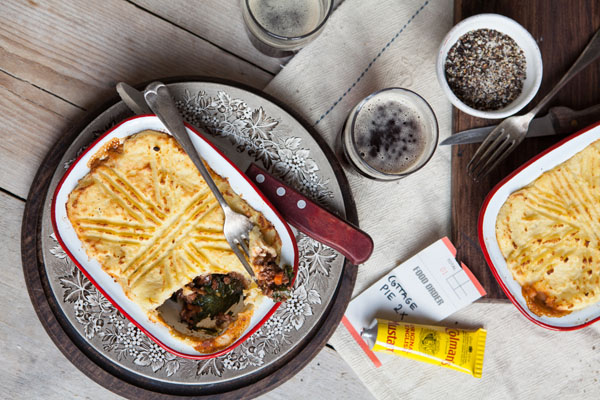
Place into the oven under the gril for about 10-15 minutes or until your mash has some color. It depends really on what you like, lightly coloured or not.
Serve with a beer, or wine if you like.
Put the rest in the freezer, we usually have some leftovers. These pies freeze very well, just defrost in your fridge overnight when planning to use.
Enjoy
You might also enjoy
Beef and Oyster pie
Watercress and trout pie
Sussex Stewed steak
Thank you for leaving a comment!
The post George, the Dragon and the Cottage pie appeared first on Miss Foodwise.
]]>