• Skip to primary navigation
  • Skip to main content
  • Skip to primary sidebar
  • Skip to footer

Miss Foodwise

Celebrating British food and Culture

  • Home
  • About
  • My Books
  • Photography
  • Index
  • Contact

recipes

The white loaf that will make you proud

21st September 2014 by Regula 6 Comments

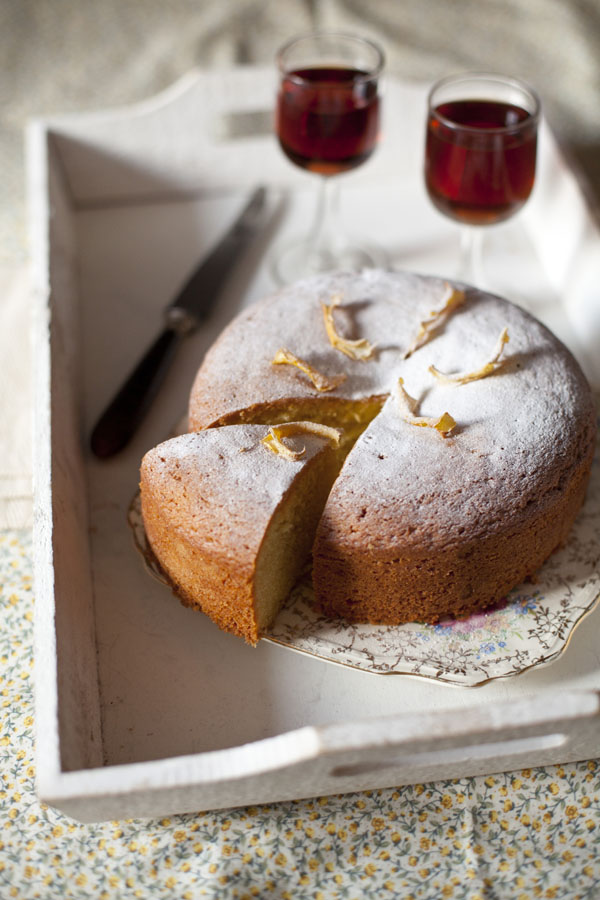
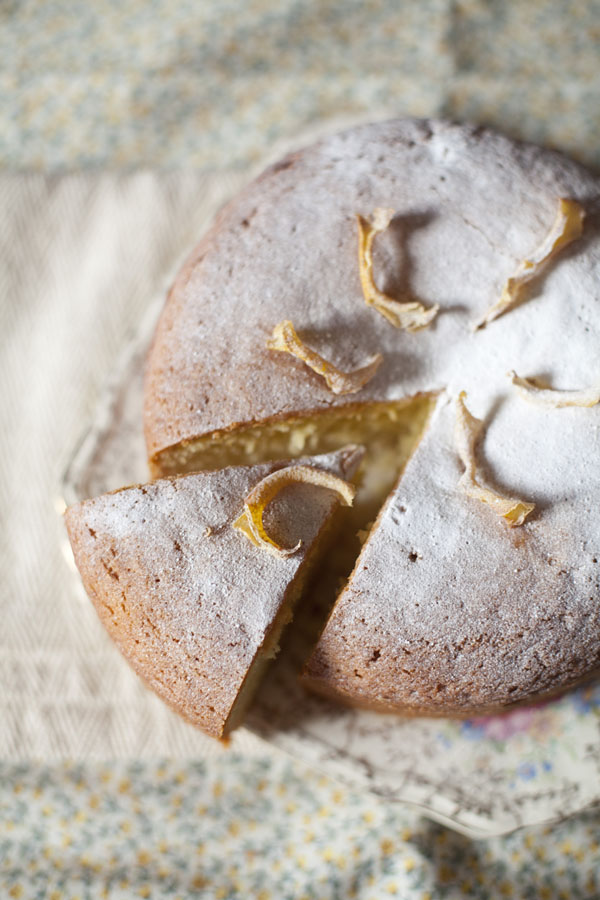
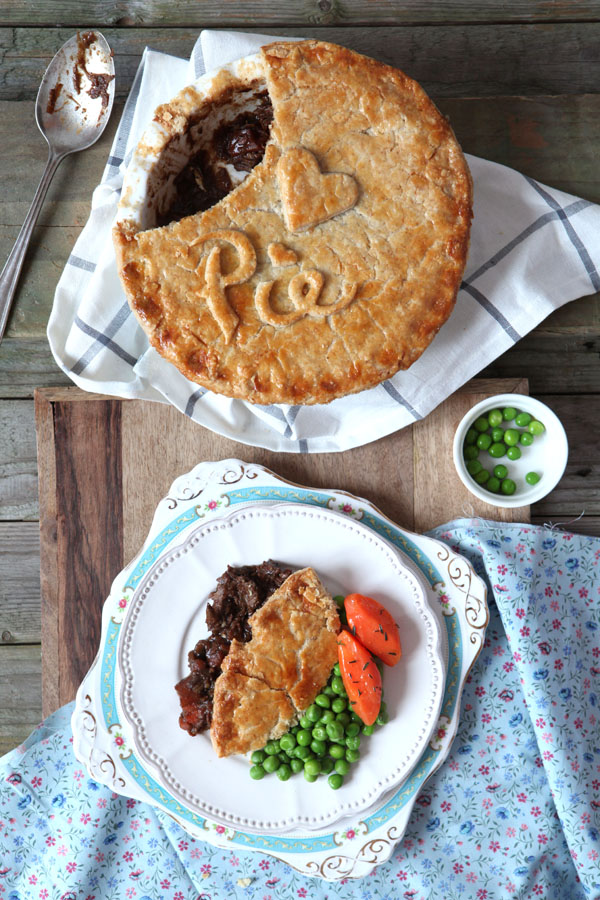
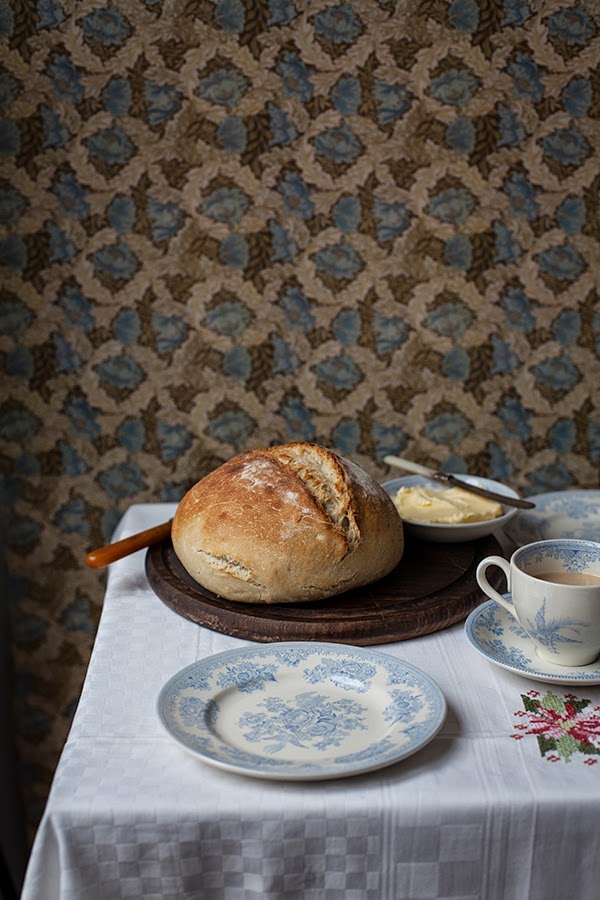
The power of an image.
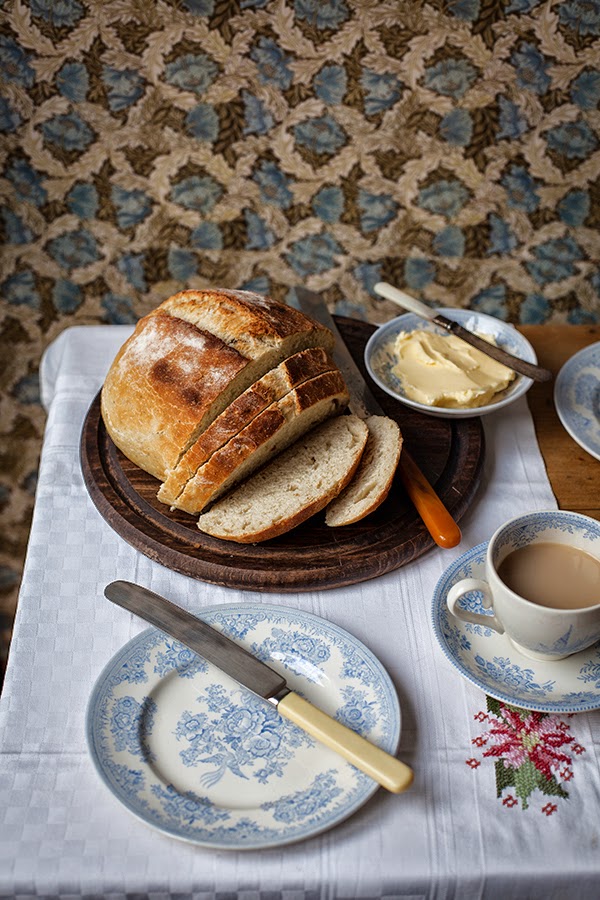
I posted a picture on Instagram and Facebook of two loaves of bread I baked on wednesday. I was proud of them, they were beautiful, they were utterly perfect to me.
I had scored the bread this time with little hesitation and fear it would ruin my loaf, and while it was baking in the oven, I watched trough the oven window in true British Bake Off style how my score cracked open and baked into my most proud bake in my life.
Slightly embarrassed by my pride and joy I mentioned that to you the bread might seem plain, but to me they were special. The answer came in the form of that image becoming the most ever likes picture on my facebook and my instagram feed. You loved it too.
So much that you emailed me for the recipe, to go home and bake these loaves yourself, to see it rise, and bake and fill the house with the smell only bread is capable to induce…
Utter joy.

Bread has been a staple since the beginning of time, it evolved from a flat, dense gritty loaf to the small bun sized wheat loaves of the Saxon monks. Wheat and bread was so valuable that often food rents consisted partly of loaves or grain. Wheat and barley would be planted together so if one harvest failed, the barley which was a hardier grain would survive and save the people from the starvation that was luring behind every tree and every sheaf of corn. But harvest failed plenty of times and so bread was made from dried peas and beans. This must have been an very heavy and unpleasant bread but it would provide plenty of nutrition during shortages. Windmills and communal bread ovens can be found in the Domesday book but as they were owned by the manor or monastery, they were not free to use. A portion of the grain or bread dough had to be payed for the use of the mill and oven, therefore the peasants continued to mill the grain themselves using a hand quern that must have taken many long hours of hard labour to end up with a small portion of flour.
People must have suffered from acute toothache with the amount of grit in the bread. Even the upper classes preferred to soak their bread in their all important sauce and have their meat so succulent that it fell of the bone. Chewing would have been difficult if you would have lost most your teeth in your early adulthood.

Bread remains a staple food in the centuries following the Norman conquest and the Middle Ages, but recipes for breadmaking remain unknown from that period except for a mention of the process of bread making in a poem.


Although today bread still remains the most popular base of our diet, it has also become a source of worry with gluten and wheat intolerances becoming nearly as frequent as famine was in ancient times. Although bread has been a staple food for centuries, in the early years it was labour intensive to mill the grain by hand so bread would not have been the thing to fill up the bellies of the poor. They would have had a modest piece of bread, with their pottage, or a piece of cheese but not as plenty as we often have it today.
Wheat has also been modified to an extent that it is easier to harvest, but the quality is less. The need to have everything fast and plenty changed the way we create bread, with added chemicals to make is rise in a fraction of the time if would actually need to break down the enzymes in the grain which make it harder to digest. There is talk of a modern day ‘bread belly’ with people suffering from the effects from fast factory made bread which has little resemblance to the real bread of our ancestors. In my opinion the modern everlasting, spongy bread, sometimes dyed with malts or molasses to make it appear as a wholewheat loaf while it is not, is a new kind of poverty, the poverty of quality of the most basic of foods. Our daily bread.


So
here is my recipe, which I just in true honesty came up with by winging
it. It’s quite the recipe for a plain white loaf, but strangely enough
it came out differently than before. I added a spoon of my precious 1
year old organic wholemeal spelt sourdough starter, and a drizzle of
good English rapeseed oil. Other than that of course, (I always use)
Cornish sea salt, organic strong white bread flour and water which I
first boiled and let cool to tepid before adding organic dried yeast.

To make two 700-800 g loaves

What do you need

  • 1 kg of organic strong bread flour, stone ground if you can obtain it, is the best
  • 700 ml of tepid water
  • 2 heaped tsp of dried yeast
  • 20 g of seasalt flakes, not the over processed, white powder kind please
  • 1 generous tablespoon of sourdough starter if you have some
  • 1 teaspoon of rapeseed oil, or olive oil

Method
Turn on your oven on the lowest setting to just make it nice and warm, then turn off.
Boil water and let it cool until blood heat (tepid is fine) before adding the yeast
In a large bowl or soup pot add the flour and make a well.
Drizzle in your oil, salt and sourdough on the edges without letting them touch eachother.
When you have mixed your yeast with your water start adding it to the well and make a turning movement with a couple of fingers or the back of a wooden spoon to gradually mix the flour with the water and yeast.

Keep on doing this until you get a well mixed dough, now either turn out the dough on a floured surface to knead or do as I do, leave in the bowl and use one hand to pull and twist and push your dough for about 15-20 minutes, constantly turning the dough so you have kneaded it well and the dough is nice and springy. It really is very important to work the dough well.
Now put a shower cap over the bowl to keep the dough from drying out.

Place in your warm oven – please make sure it is not too hot, just like a nice warm summers day – and leave your dough there for an hour or until doubled in size.
I feel my dough rises much better when I do this, I live in a very cool house which is never warm enough to give your dough that cosy feel it needs to feel happy and rise.

After your dough has risen for 30 min to 1 hour, take it out of the oven gently and turn it on to full heat. Mine is 250° C. Also place a baking tray in the oven to heat.

When your oven has preheated knock the dough back by simply removing it from the bowl onto the floured work surface where you can divide and shape it in two for two loaves, or in four long stretches to get a ciabatta style bread, by that I mean one that is perfect for dunking in soup, to serve with cured meats and cheese and so on.

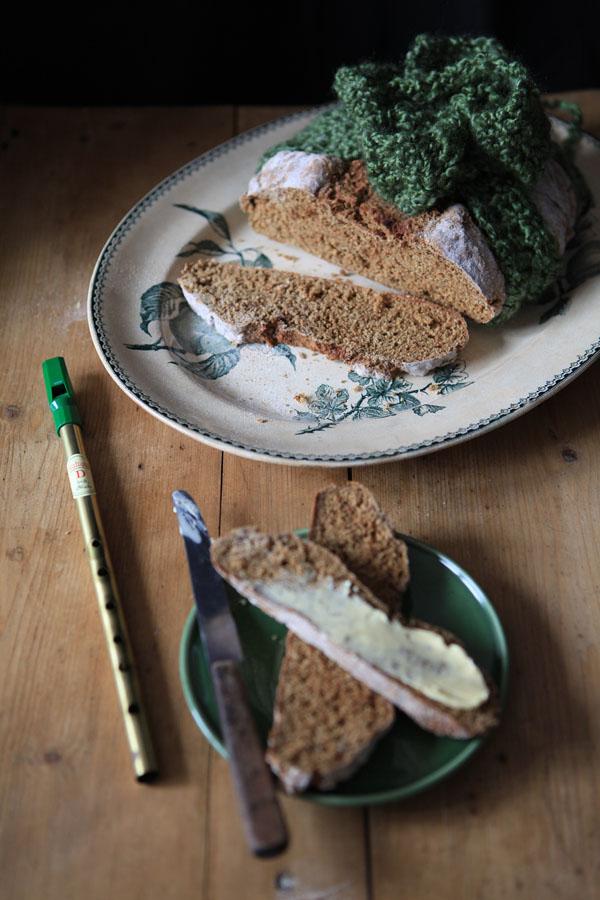
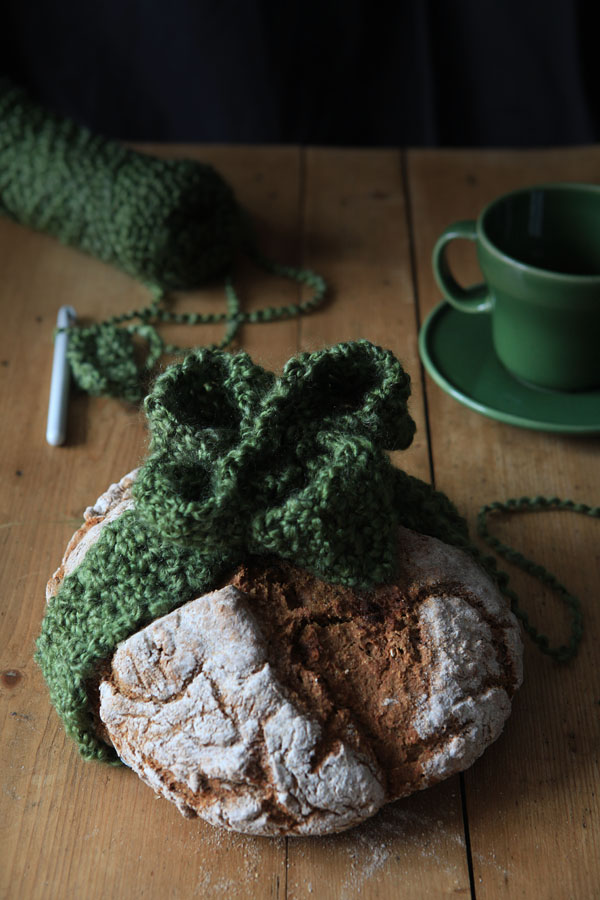
Dust the tops of your loaves with flour and just before you place them on the heated baking tray, score the bread with a very, very sharp knife about 1 cm deep. A stanley style knife works best, other knives are often not sharp enough, and not thin enough to make that all important score.

Place in the middle of your oven, on the heated tray, and chuck a bit of cold water on the bottom of the oven to create steam
Bake for 10 min on full blast
After 10 min turn down to 220°C and leave for 20-25 minutes.

These loaves freeze perfectly, when you need them, defrost in a kitchen towel the evening before and preheat your oven to full blast, place a ramekin with water into the oven with the bread and bake for 5-10 minutes.
Fresh home made bread in 5-10 minutes, epic. Just think ahead and always make two loaves instead of one. 1 kg of flour is also easier to work with that 500 g of flour.

Enjoy and if you bake this bread, show me a pic! I love it when you send me your pictures of your creations!

You might also like
Soda bread, a loaf in 45 minutes

What’s your favourite bread recipe?
Don’t forget to leave a comment!

Filed Under: Bread, Food issues, Uncategorized Tagged With: baking, bread, food issues, recipes

Sweet Cheese Curd Tarts and the Road to a Book

28th May 2014 by Regula 17 Comments

Those who follow my instagram already know that I have been working on my very own book the last few months. (There is even a # hash tag on it to follow some of the process, I know, how very modern of me.) It is a scary yet exciting journey, one with occasional bumps in the road and one with smooth pathways. I thought it would be easy, I couldn’t be more wrong.

I am fortunate that my publisher was super excited about me to design the book myself and photograph it, which isn’t a given thing. They gave me the freedom to come up with a concept no matter how crazy it sounded. They wanted the book to be ‘totally me’. This was always something that was made up in my mind. If the book would be designed by someone else and photographed by someone else, it would not be my book. I would not want that book. This isn’t a narcissistic urge to just get ‘a‘ book out there, this is an artistic project for me. I have been a graphic designer my whole professional life, I have done numerous layouts for books, booklets and magazines. Not being allowed to design and layout my own book would just feel completely and utterly wrong. But of course, this means doing the work of 3 maybe 4 people all on my very own…
I will have to turn down future jobs to get be able to do this big book project but the book will by no means pay enough so I can pay my bills. All the money from the advance, the layout work and the photography will go to the actual creating of this book. But although I would have liked to at least have some tiny profit, I am also very happy that the subject of my book wasn’t chosen for me, and that I can really do what I want. I have had other offers from publishers, who had the subject of my book already decided for me, of course I had to turn them down. As I said, this is not just ‘a‘ book.

Because of the significance of this project, I often freeze and can’t write or cook or photograph. Being a creative creature means you constantly doubt your work, and push yourself and push and push. I ask myself constantly, is this perfect enough. In every word and image I put an enormous effort, the story I tell needs to be right, it needs to transport you. I am not shooting a book, I am creating images that will hopefully whisk you away to my imaginary English cottage with limestone walls and a cream colored coal fired Aga stove. I want you to smell the slightly burnt toast that has the flavour unmatched by any toaster because it has been toasted on that oh so coveted AGA coal fire.

When I freeze, it is the moment when I am in doubt. Doubt is your enemy.
You must not forget, I started my own business as a freelance photographer/graphic designer/writer in januari, which means I am not surrounded by colleagues anymore, I work alone, and often I will be abroad, alone in my B&B. There’s no ‘can we have a chat about the concept or designs’ like in the advertising agency I worked at. I have to ask myself if it is right, I have to be objective and not let my heart get too much involved in it.
Which is hard, because I am a very passionate person. There is hardly any grey in me, it is either good or bad. There is no ‘this will do’ in my book – literally and figuratively speaking.

I am writing about this because I know a few people in our little online food lovers community who are also working on a book or book proposal. Sometimes to read someone else saying it is not a walk in the park, helps you to be okay with it, if one a day you wake up and are overtaken by the fear this great project brings with it.
It happens to us all.

But also because I need your help, I need people who would like to be involved and test a recipe for me, or more if you’re up to it. Eternal gratitude to my recipe testers so please get in touch if you want to get cooking for me – my email is on my contact page.

But on to that tart you see here, this is a sweet cheese curd tart with lemon. It is one of the recipes you just develop by accident, while trying to make something else you come up with an equally scrumptious dish.
Sweetened cheese curds have been used as a sweet treat on its own and in tarts for centuries, early recipes like this are the very first ancestors of the cheesecake we know today. Because I have used lard in the pastry, the tart has a sweet yet also savoury hint which is perfect for the likes of me who do not enjoy a very sweet treat.

What do you need (makes two 14 cm tarts)

Best is to start the day before you want to bake these tarts

pastry

  • 250g plain flour
  • 75 g butter
  • 50 g lard
  • 0,5 tsp baking powder
  • 30 g sugar
  • 1 egg yolk
  • baking paper for blind baking

filling

  • 300g cheese curds
  • 2 eggs
  • 100 g sugar
  • 25 g melted butter
  • 1 tsp of orange blossom water
  • the zest of 1 lemon

Cheese curds

  • 3l full fat preferably raw milk
  • 2 tsp salt
  • 2 tsp rennet (find it online)
  • 4 tsp buttermilk or lemon juice
  • a cheese cloth

To make the cheese curds
heat 3 liters of full fat preferably raw milk to exactly 37 degrees Celcius.
add salt, rennet – you can buy it online and I used vegetarian and add buttermilk or lemon juice, butter milk works best
stir and leave to stand for 15 minutes – 30 minutes until the milk has separated from the whey. When the milk has separated from the whey, transfer the curdled milk to a bowl covered in cheese cloth. Drain the curds, leave them to hang for 3-5 hours
You might have some left after making the tarts, the cheese is good on its own, I like to salt it slightly and use in salads

The pastry
Mix the butter and lard into the flour with a round bladed knife, do this until you get a mixture that looks like breadcrumbs, add sugar and the egg yolk and bring the dough together. Be careful not to overwork the dough or it will get too chewy, place in the fridge to become firm. You can do this the day before too.

The filling
Put the curds into a clean bowl and tear them apart in smaller pieces, add the eggs, sugar, melted butter, orange blossom water and the lemon zest and leave to stand while you roll out your pastry.
Preheat your oven to 180°C
Roll out your pastry and place it in your tart tins, trim the edges and prick the bottom of the tart with a fork
Place baking paper over the pastry (make a round shape by folding the paper, so it fits better) and place baking beans or rice on top. Pop in the middle of the oven for 30 minutes or until golden in color

When the tart casings are ready, pour the curd mixture into each tart and pop in the oven until they bubble up nicely and become nice and yellow in color.

Serve as you will, I decorated mine with violets for this occasion.

Good with a glass of Whisky or Rum.

You might also enjoy
The tarts at Tudor court

Further reading
How writing a book is different than a blog / David Lebovitz on Dianne Jacob’s website

Filed Under: Sweet, Uncategorized Tagged With: about me, cheese, recipes, tart

George, the Dragon and the Cottage pie

23rd April 2014 by Regula 5 Comments

Wishing you all a happy Saint George’s Day with these humble cottage pies. I’ve been mostly working on my book, stuck with my nose in research and absolutely loving it but in the evening I long for great simple food with pure flavours. This pie is just that, with the best spuds you can find for your mash, decent flavoursome beef and a layer of moist spinach, this is a treat for me. I just wrap it in a towel and relax with a beer and a movie.

Today will be marked by celebrations with a lot of beer in most parts of Britain, often started by a good old pub meal that very likely will consist of a hearty pie.
Saint George’s day is the National Day for England although it is not an national holiday in Britain. As you will know, he is the patron saint of England and he is nearly always depicted slaying a dragon.
The origins of George and the dragon are quite obscure, like so many legends are. The earliest written source of Saint George in Britain can be found in the works of Bede, a monk from Northumbria who lived around the end of the 7th century.
It is not a saints day unique to Britain however, the feast of Saint George is celebrated throughout Christian and Protestant countries and all around the 23th of april, the date on which he would have been martyred.
Of George nothing is certainly known, it is most widely accepted that he was a Roman soldier from Palestine who lived in the late 3rd century AD.
Born as Georgios, Greek for ‘worker of the land’ he became an imperial guard to the emperor Diocletian, but when Diocletian issued a decree that every Christian soldier should be arrested, George renounced his emperors ruling. He declared himself openly to be Christian and refused to convert to the old Roman gods. Diocletian tortured and later decapitated George for his refusal.

No doubt you will all have been waiting for the dragon slaying moment in this story but unfortunately I will have to disappoint you as there are no dragons in this tale.

The tale of Saint George and the dragon dates from a much later legend during Medieval times. Here the story of George would have been Eastern in origin and brought back from the Crusades. Before the Middle ages George was depicted as a soldier but around the 11th century that changed to the now more popular dragon scene. The first written source is believed to be a 11th century Georgian text that can be found quoted in the book The Warrior Saints in Byzantine Art and Tradition. 

Then the tale of George and the dragon appears in the Legenda sanctorum or Golden legend, a collection of hagiographies (stories of the Saints) by Jacobus de Voragine. This book of which there were over a thousand of manuscripts in the 13th century was very popular and was one of the first books that were printed in the English language when printing was invented around 1450.
Jacobus de Voragine tells the tale of the place Silene in Lybya where a dragon lived that terrorised the countryside. To appease the dragon, the people would bring it sacrifices in the form of sheep and also children who were chosen by lottery. One day the daughter of the king was chosen in the lottery and he offered all his wealth to save her. The people refused and the maiden was sent to the dragon dressed in a wedding gown. Then a man named George passed the lake where the dragon lived and saw the princess in distress. He charged towards the dragon with his lance and wounded the beast, he then bound him and took him to the village with the princess he had saved from it. The villagers all in fear of the approach of the dragon were then given the choice. Become a Christian and George promised to slay the dragon there before them. They all converted and George slew the dragon.
There are other similar versions of this tale, as there are with so many legends and from the 15th century on we find a large amount of illustrations, paintings and stained glass windows illustrating Saint George slaying the dragon to save the maiden throughout the world.
Legends are usually there to tell the oldest tale in the book, good and evil, right and wrong.
What really happened and if it happened at all is not important anymore, it is what you do with it and how you interpret it.
My days of being religious have long been gone, but I still like to hear the stories, and I like to try and trace their origins.
What better way to celebrate than having a meal together, these cottage pies are easy and can be made well in advance and popped in the freezer until you need them.
Cottage pie has a long history, it has always been about using up leftover meat to create a new and filling meal.
So what are you up to today?

Cottage pie
What do you need (serves 2 with leftovers for 1 portion)

  • 400 g beef mince, from chuck steak
  • 1 large chestnut mushroom or a white one
  • 1 stalk of celery
  • 1 small carrot
  • 1 clove of garlic
  • a knob of butter to fry the meat and veg
  • 1 small tin of tomato puree 50-70 gr (concentrate of tomato)
  • 1 glass of red wine or stout beer like guinness – 250 ml
  • 2 teaspoons of Worcester sauce
  • 300 ml of beef or vegetable stock (I use an organic vegetable stock cube)
  • Salt and pepper to taste
  • A few handfuls of fresh spinach (you can use from your freezer too)
  • Potato mash, you need 4 large spuds or use leftover if you have some
  • Add 4 teaspoons of grated cheddar cheese
  • 2 individual trays, or one larger one. Small pie pans work well. (14×19)

Method

Cook your spuds and make your mash with milk, butter, nutmeg and salt. If you like to make it richer, add an egg yolk too. You need a silky smooth mash which is slightly wetter than you’d eat it normally as it dries a bit in the oven.

Chop all the vegetables and add to a heavy based casserole, glaze a little over a medium flame and then add the meat. Brown the meat and add the tomato puree, stir well to combine evenly
When the tomato starts to caramelise – which means stick to the bottom of the pan, pour in the wine or beer. Stir to loosen up the meat and veg.
Let the booze evaporate, it takes about a minute, and it will be reduced a lot. If you don’t want to use alcohol, use water or stock

Now pour in the garlic, stock, and the Worcester sauce and put on the lid, leave for 30 minutes but check on it frequently so it doesn’t burn to the base. You may leave it longer too, it is merely for the flavours to develop.

Use boiling water from the kettle and blanch your spinach, drain and add a cube of butter, you may omit this but butter does taste so very well.

Preheat your oven to 180°C

Place your spinach in your chosen baking tray or trays, season with pepper.
When the meat is ready, transfer it to you tray or trays.

Now make the mash layer by scooping blobs of potato on the meat, then spread out.
You can pipe this mash, but who has the time to pipe mash on a weekday??

Place into the oven under the gril for about 10-15 minutes or until your mash has some color. It depends really on what you like, lightly coloured or not.

Serve with a beer, or wine if you like.
Put the rest in the freezer, we usually have some leftovers. These pies freeze very well, just defrost in your fridge overnight when planning to use.

Enjoy

You might also enjoy
Beef and Oyster pie
Watercress and trout pie
Sussex Stewed steak

Thank you for leaving a comment!

Filed Under: Meat, traditional British bakes, Uncategorized Tagged With: beef, British culture, recipes, savoury pie, spinach

Cherry and almond cake and a walk on Gold Hill in Dorset

4th August 2013 by Regula 23 Comments

As the weather suddenly changed from gloriously sunny to dreadfully grey again, I ventured out to beautiful yet misty Dorset to be a judge on the Great Taste Awards.
After seven hours on several trains I finally arrived in Shaftesbury, one of the highest and oldest towns in England. Shaftesbury, also known as Scaepterbyrg in the Domesday book was either built or rebuilt by Alfred the Great in the 9th century when he also founded the abbey where his daughter Ethelgiva would be the abbess. Although a Saxon settlement, there is reason to believe that a much older Celtic village named Caer Palladur used to exist on this hilltop.

I walked up and down Gold Hill three times and sat on the cobbled street at the top of the hill to watch the evening spread it’s cloak over the valley. After a walk I ended my day with a much needed pint of Chocolate Stout at a local pub and a plate of excellent Devon crab – with Hovis bread of course, as you do when in Shaftesbury. The town and especially Gold Hill has become famous for the evocative Hovis advertisement film in the seventies. The film was directed by Riddley Scott, whom you might know from films like Gladiator and featured a small lad pushing a bike with a basket laden with a loaves of bread up the steep cobbled street of Gold Hill on the tunes of Dvorak’s ‘New World’ Symphony. The advert has been voted Britain’s most popular advertisement of all time and shows the power of a good advertising campaign. It’s a deceiving plot to convince the consumer that Hovis bread is something more artisan than just a factory made bread. It feeds on nostalgia, showing images of times gone by, suggesting the bread is still being made by the traditional method. It is not. It is made by the fast ‘no-time dough’ Chorleywood method using not only wheat flour but also a larger amount of yeast, emulsifier, stabiliser and Soya flour. Things that are hardly traditional.


This brings me back to the Great Taste awards and how important the Guild of Fine Food is in supporting artisan and ‘real food’ producers. We’re turning back towards foods that are once more traditionally made with the best possible ingredients out there. Pasture fed beef is now a regular term as well as rare breed pork and raw milk yoghurt. We want quality for our pennies again, and we want to make a difference when we do our food shopping.

After my ponder gazing down over Gold Hill I decided an early night is what was needed as the next morning some serious judging had to be done. Not only is winning a Great Taste Award for your product an excellent way of promoting it, it’s also an unique opportunity to receive feedback about that product from the ‘crème de la crème’ of the British and Irish food scene. The panel of experts is perfectly balanced and consisting of food buyers for the leading speciality stores, seasoned food writers, critics, chefs and other people who have earned their mark in food.
Every grade we gave was weighed up and discussed, these decisions have not been taken lightly as so much depends on it for the producer. In the afternoon it was up to a selection of the judges to choose the overall winner from the 15 products that were chosen to receive the 3 star rating. I can’t be sure which of the products won the overall winner of the awards, I have my fair idea as one of the products left me silent and wanting for more… We will have to wait until september when all the winnings are announced.
I feel truly privileged to have been a part of this and to taste so much beautiful food.


So here I give you a slice of the cake I took with me on my long travel to Dorset this week. A super easy gluten-free, low GI, super delicious and nourishing Cherry and Almond cake.
While other years the yield of my tree was about five cherries, this year it must have been twenty. I had my eye on them as the birds had too, and I was set on picking the little red jewels before the birds would steal them. Although I do feel a bit guilty for taking this delicious cherry treat away from Mr and Ms Blackbird, the family Great tit and the little Wrens, this would be the first year I would actually get to enjoy my own crop.
At first I was thinking of preserving the cherries by making my cherry brandy, but then I suddenly craved a cake with almonds and thought the cherries would make a lovely addition to the bake.
I really was too hot to turn on the oven to be honest, but when a girl wants cake you can’t argue with her. So I baked.
To get as much out of the oven temperature as possible I also added a jar of prunes to the oven, I like to do that because then you are using your oven for more than just your cake and end up with a lovely slow cooked prune puree that works like magic as a filling in a prune tart like this one here.

What do you need

  • 200 g good quality unsalted butter soft, not runny
  • 100 g sugar
  • 3 organic eggs
  • 50 g buckwheat meal or another gluten-free flour
  • 125 g almond meal made of blanched almonds
  • cherries, a handful, pitted and halved

Method

  • Prepare a 22 cm round cake tin – spring form is best -with greaseproof paper and set aside
  • Preheat your oven to 160° C
  • Cream the soft butter and sugar together in a mixing bowl and use an electric mixer to beat the mixture until light and fluffy
  • Add the eggs one by one, beating well
  • Add the almond meal and the other chosen gluten-free flour bit by bit and combine well
  • Transfer the dough into the prepared cake tin, press down the halved cherries into the dough and put in the preheated oven for 60 minutes or until golden.

Tip: Why not use the cherries from last years Cherry brandy ?

You might also like
Strawberry Spelt Shortcake
Chocolate beetroot and walnut cake
Cherry brandy

Filed Under: Sweet, Uncategorized Tagged With: almond, cake, cherries, Dorset, glutenfree, Great Taste Awards, Kent, recipes

Madeira cake to get you through the busy days

9th May 2013 by Regula 14 Comments

For years I thought Madeira cake was made with the fortified wine Madeira, I thought it was the English equivalent to an Italian Vin Santo cake, which is in fact made adding the Vin Santo.
Madeira cake is a closed textured cake that was designed in the 19th century to accompany a glass of Madeira and other sweet wines. It was a cake for the upper class, people who could afford to bake a dry crumbly cake that doesn’t keep well and had to be enjoyed with a drink of some kind and best within two days before it would get too dry.
Precision and plenty of beating is required to achieve that close crumbly texture. You have to be a patient cook and the ingredients used must be of the best possible quality.


I searched all over for some more history facts behind this iconic cake, unfortunately there was little more information to be found. The cake only starts to appear in my cookery books from the 50s or 60s onwards.

I baked this Madeira cake on a sunday knowing the week ahead would be a busy one. For some reason I find it more pleasant to deal with hectic weekdays when I know I have a home made piece of cake to look forward too. B will have it for breakfast with his coffee, I will have one half at 11 and the other half at 4 with my Ear Grey tea. At moments when time is of an essence, all too often it is easier to go and get yourself an unhealthy processed snack. Although you shouldn’t eat cake all day every day, I believe a home made bake is much healthier than a store bought. At least now you know the quality of the flour and eggs used, and you have the choice in choosing the best farmhouse butter instead of tasteless margarine that is too often used in store-bought cakes.

Although Madeira cake is made with wheat flour, I opted to use the more nutritious Spelt instead. I started from the oldest recipes I could find in my collection of vintage cookery books from Jane Grigson. This recipe appeared to me as the more traditional version as often lots of extra things are added to the cake like almond flour or candied mixed fruits. I think it very possible that in the 19th century each household would have had their own recipe for Madeira cake depending on the cooks choice.

Madeira Cake
Adapted from a recipe by Jane Grigson’s ‘English Food’

What do you need

  • 175 g good quality unsalted butter, soft not runny
  • 175 g caster sugar
  • 275 g spelt flour
  • 2 heaped teaspoons of baking powder (use only one when using wheat four)
  • 4 large free range eggs
  • grated zest of half an organic lemon
  • thin peels of zest of half an organic lemon for decoration

Method

  • Prepare a 18 cm – 20 cm round cake tin with greaseproof paper and set aside
  • Preheat your oven to 180° C
  • Cream the soft butter and sugar together in a mixing bowl and use an electric mixer to beat the mixture until light and fluffy
  • Add the eggs one by one, beating well
  • Add the lemon zest, stir well
  • Sift the flour and the baking powder so the baking powder is divided nicely
  • Gently fold the ingredients together and combine well
  • Transfer the dough into the prepared cake tin and put in the preheated oven for 45 minutes
  • After 45 minutes ass the lemon peel to the top of the cake, bake for a further 15 minutes
  • Decorate with a soft dusting of icing sugar

This cake keeps for 3-4 days in an airtight container.


You might also like

Britannia Sandwich cake

Kentish Cobnut cake
Chocolate beetroot and walnut cake

Filed Under: Uncategorized Tagged With: baking, British food, cake, recipes

Nourishing Stout and Oat Drink

1st May 2013 by Regula 24 Comments

My mother always told me she and my grandmother loved drinking a Trappist beer when they were breastfeeding, she said that it was nurturing for new moms and that in the old days the nurses would actually bring a beer to the mothers to stimulate the lactation process.
But it isn’t just a myth, if a nursing mother drinks a good old pint of beer, the yeast and hops in it will help increase her milk supply. Hops are also calming, so good for the new mom. Brewers yeast is also taken as a supplement to boost the milk supply by mothers who do not enjoy the taste of a lovely beer.

Trappist is a Belgian beer but I think Stout is the prefect beer for this recipe as I’ve heard stories about mothers receiving a Stout when they have given birth, a Nourishing Stout would have been better but sadly those haven’t been brewed commercially for decades. Milk Stout is called that way because it used to contain lactose, a sugar derived from milk. Lactose doesn’t only add sweetness to the beer, it also adds calories which is why together with the yeast and hops in the beer it was given to lactating mothers. Although Milk and Nourishing Stouts only became popular after the First World War, the usage of lactose and the mentioning or illustrating of it on the beer labels was forbidden after the Second World War due to rationing.

The only surviving Milk Stout is Mackeson’s, I came across it by accident when I was at Tesco’s a few months ago, the can still shows a milk churn that has been Mackeson’s trademark since it was first brewed in 1907 at the Mackeson’s brewery in Hythe, Kent. Mackeson’s is now brewed by InBev so I doubt that there is still any lactose in the beer today.

As I am creating this concoction for my friend and fellow blogger Zita who gave birth to a healthy little boy a few hours ago, I am going to make it as nutritious as I
can.

Now luckily I know Zita does like an occasional beer so I’m not
bringing her anything she wouldn’t like to drink. I am including a way to remove the alcohol from the beer in the recipe, so it is ‘safe’ to drink for those who are worried about getting their newborn drunk. This drink isn’t
solely for nursing mothers, it is also for the dad, the friend, the guy
in the street and the health food lover. It is packed with nutrition.

To go with the Stout I’m making my own Oat milk.
Oats have a low glycemic index, which can help to regulate blood sugar
levels and make you feel fuller for longer. They also contain lots of vitamins,
minerals and antioxidants, are a good source of protein and complex carbohydrates.
You can use 3 types of oats for this recipe, the groats which are the oat kernels with the hulls removed, rolled
oats which are steamed groats that have been rolled out and flattened and steel
cut oats which are the oat groats chopped up. Steel cut oats are therefore the
best choice as they contain more of their original nutrients but they are not as easy to find as rolled oats.

To break down the phytic acid content which makes the oats more digestible and reduce anti-nutrients so your body can soak up a lot more of the nutrients, I soaked the oats with cider vinegar. You can also use live yoghurt as lactic acid fermentation.

This drink is for all those who love Stout, if you don’t care for Stout I don’t recommend you try this drink as it is quite bitter. The bitter Stout works perfectly with the sweet oats, and even has notes of a coffee with lots of milk.

Before you skip to my recipe, have a look at our feast for Zita!
Maybe you remember the Virtual baby shower we did last summer, today were are back with a whole new table of food, follow the links to the blogs to read the other ladies recipes:

Our Menu
Giulia: Scarpaccia
Regula: Nourishing Stout & Oat Drink
Beth: Moghrabieh Salad with Preserved Lemon and Coriander Pesto
Jasmine: Whole Wheat Flour Cocoa Cookies
Artemis: Kasopita – Cheese Pie from Εpirus
Sarka: Kiwi Carpaccio with Pecans and Manuka Honey
Emiko: Ricotta and Dark Chocolate Cake 
Sneige: Pomegranate Curd with Seedy Pine Nut Crust 
Simone: Pistache Raspberry Cakes
Karin: Fresh Pea Souffle with Goat Cheese

Nourishing Stout and oat drink

What do you need

Start the evening before, or in the morning.
To prepare the oats:

  • Steel cut or Rolled oats, 1 cup (you can use the groats if you can find them)
  • apple cider vinegar (or live yoghurt), 1 teaspoon
  • water, 2 cups

For the drink:

  • water, 2 cups
  • 1 date, stoned (2 if you like it sweeter) and cut finely
  • Stout or Guinness, 1 cup
  • a fine sieve
  • a blender or food processor

Method

  • Combine the oats, cider vinegar (or yoghurt) and water in a bowl, cover loosely and leave  to soak for at least 8 hours.

8 hours later …


  • Drain your oats by straining them through a fine sieve, discard the soaking water
  • Rinse the oats gently to remove the starch
  • Put the oats and the date into the food processor (I used my Vitamix) and blend

To make this drink with alcohol free stout:

  • add one cup of stout to a small saucepan and bring to the boil, simmer for 5 minutes then let it cool. (the drink will taste less bitter with this method)
  • Add two cups of water and one cup of stout and blend again until creamy
  • At this point you can strain your oat milk through a fine sieve again to remove any of the oats, I choose not to, to keep the drink smooth and a little thicker. Discarding the oats is trowing away nutritious food.
  • If you want to strain, you can keep the leftover oats to make cake or pancakes.

Leave the drink to rest for 30 minutes – 1 hour before use

Enjoy!

You might also like
Strawberry and Pimm’s Granita
Drunken cherries 
Cobnut Brandy
Sloe Gin

Filed Under: Drinks, Uncategorized Tagged With: beer, Drinks, oats, recipes, stout

Hot Cross Bun and Butter Pudding – Happy birthday to me …

28th March 2013 by Regula 29 Comments

Here we are again, the day I look forward to the most during the year … my birthday.
It’s the day when I am queen, when I am allowed to wear a crown of flowers and walk around in my widest petticoat no matter where I’m going even if it is a farm or going on a clifftop walk on my favourite Sussex coastal path.
Today – I bloom – like fiery red flower in a colorless world.


It’s a big birthday this year -29- for the second time. Some part of me wanted to do a big party, another part just wanted it to blow over. I decided on a last minute posh afternoon tea at Kensington palace with my friends Sassy and Jo when we were gathered in London for Bruno‘s exhibition.
I had a special dress, made by my friend Jo, you might remember her from her Hotpot recipe a few months ago. Jo designs and produces beautiful bespoke wedding and special occasion gowns and after months of working on the design together it was ready to flaunt when we went for our Afternoon tea.

I call it my England dress, it shows the story behind my love for this country and its ways in an illustration Bruno designed and Jo embroidered onto the dress. I felt tears coming to my eyes when she revealed the dress… Aren’t I a lucky lady …
Jo’s craft-wo-manship is exquisite, the detail is amazing. Her brodeuse captured Bruno’s every line, flower and every tiny apple. The dress is all kinds of perfect and if you know me -being a perfectionist- I hardly ever find things perfect…
It is a special feeling when a friend makes you a dress, it will never feel completely mine, it will always be hers as well.
Thank you darling Jo, for making me the most special dress in the world x Thank you my dear friend Sassy for taking these pictures as a keepsake to remember  x

A few of you were eager to see my dress so if you aren’t interested
in a girl running around in a red dress feeding swans and getting
attacked by squirrels – scroll all the way down for a good pudding!

Earlier this week I posted my recipe for Hot Cross Buns, while testing the recipe I had mountains of buns leftover and I didn’t want to waste them so I froze them. Now I use the buns to make my Hot Cross Bun and Butter Pudding. I guaranty you that a Bread and Butter Pudding has never tasted better! As the Hot Cross Buns contains spices and currants already, there is no need to add more.
Enjoy lovely people x


Now for a sweet treat …

Hot Cross Bun and Butter Pudding


What do you need
2 enamel 20cm pie dishes
2-3 stale hot cross buns sliced in 1 cm wide slices
butter
350ml/12fl oz whole milk
50ml/2fl oz double cream
2 free-range eggs
2 teaspoons of light brown demerara sugar
2 teaspoons of raw cane sudar to sprinkle on top
Nutmeg, grated to taste

Method

  • Butter 1 side of the hot cross bun slices
  • Arrange a layer of bun slices, buttered-side up, in the bottom of the dish.
  • Gently warm the milk and cream in a pan over a low heat to scalding point, be careful not to let it boil.
  • Crack the eggs into a bowl, add three the sugar and lightly whisk until pale
  • Add the warm milk and cream mixture to the eggs and stir well
  • Pour the custard over the prepared hot cross bun layers and sprinkle with nutmeg and the remaining sugar
  • Preheat the oven to 180C
  • Place the dish into the oven and bake for 30-40 minutes, or until the custard has set and the top is nicely golden-brown

Enjoy while warm!

You might also like
Hot Cross Buns –  paganism, christianity and superstition >
My vegan chocolate and beetroot birthday cake >

All pictures except for the ones with the Hot Cross Bun & Butter Pudding are copyright by the talented Sassy of Assassynation photography.
Gown handmade in Britain by The Couture Company in Birmingham.

Filed Under: Personal, Pudding, Uncategorized Tagged With: about me, baking, pudding, recipes, sweets

Hot Cross Buns through Paganism, Christianity and Superstition.

25th March 2013 by Regula 22 Comments

The tradition of baking bread marked with a cross is linked to paganism as well as Christianity. The pagan Saxons would bake cross buns at the beginning of spring in honour of the goddess Eostre – most likely being the origin of the name Easter. The cross represented the rebirth of the world after winter and the four quarters of the moon, as well as the four seasons and the wheel of life.

The Christians saw the Crucifixion in the cross bun and, as with many other pre-Christian traditions, replaced their pagan meaning with a Christian one – the resurrection of Christ at Easter.

According to Elizabeth David, it wasn’t until Tudor times that it was permanently linked to Christian celebrations. During the reign of Elizabeth I, the London Clerk of Markets issued a decree forbidding the sale of spiced buns except at burials, at Christmas or on Good Friday.

The first recorded reference to ‘hot’ cross buns was in ‘Poor Robin’s Almanac’ in the early 1700s:
‘Good Friday come this month, the old woman runs. With one or two a penny hot cross buns.’

This satirical rhyme was also probably the inspiration of the commonly known street vendors cry:
‘Hot cross buns, hot cross buns!
One ha’penny, two ha’penny, hot cross buns!
If you have no daughters, give them to your sons,
One ha’penny, two ha’penny, hot cross buns!’

The Widows Son. Copyright Tower Hamlets Local History Library and Archive – posted with permission

A century later the belief behind the hot cross bun starts to get a superstitious rather than a religious meaning.
In London’s East End you can find a pub called The Widows Son, named after a widow who lived in a cottage at the site in the 1820s. The widow baked hot cross buns for her sailor son who was supposed to come home from the sea on Good Friday. He must have died at sea as he never returned home, but the widow refused to give up hope for his return and continued to bake a hot cross bun for him every year, hanging it in her kitchen with the buns from previous years.

When the widow died, the buns were found hanging from a beam in the cottage and the story has been kept alive by the pub landlords ever since a pub was built on the site in 1848.

To this day, every Good Friday, the ceremony of the Widow’s Bun is celebrated and members of the Royal Navy come to The Widows Son pub to place a new hot cross bun into a net hung above the bar. Legend has it that the buns baked on Good Friday will not spoil.

For whatever reason or belief you choose to bake a batch of hot cross buns on this Good Friday, it will most likely be to enjoy them with your loved ones. May it be for Eostre, Easter, the beginning of a much awaited spring or as a superstitious amulet for when you set sail, bake them with love!


If you want to bake ahead, you can easily bake these buns in advance and freeze them. Slowly defrost in a teatowel and then place in a hot oven for 5-10 minutes with a small ramekin of water to give some moisture to the warm air in the oven.
And finally … you can also find my story about Hot Cross Buns in the latest edition of Pretty Nostalgic Magazine!
If you don’t know the magazine, it’s fairly new and all about British Nostalgia, love for all things Vintage and quirky.

More on Hot Cross Buns on friday!


Filed Under: About my work, Afternoon Tea, Bread, Food & Social history, traditional festive bakes, Uncategorized Tagged With: baking, bread, British food, Food history, food traditions, recipes, spring, sweets

Wheaten Soda Bread with Stout Beer, Oats and Molasses for St-Patrick’s day

15th March 2013 by Regula 10 Comments

A lucky shamrock scarf for your bread, to keep your hands flour-free. It’s been years since I crocheted!

I was asked by Honest Cooking online food magazine to share a St-Patrick’s day recipe with them. I’ve never been in Ireland so therefore St-Patrick’s day is something I only know from visiting the Irish pubs that used to be plenty in Antwerp. The day would be advertised on the pubs blackboards weeks in advance offering live music and a Paddy’s special menu. When the day finally came, the Irish folk living in Antwerp and the Irish sailors who were docked at Antwerp port with their ships would gather at the pubs to enjoy a pint and a meal, you would hear the traditional Irish folk music from behind the corner along with loud and often drunken sing-alongs. In Antwerp you most certainly knew when it was St-Patrick’s day … But as the Irish pubs started to disappear, the St-Patrick’s day celebrations and the taste of Irish food went with them.


Wheaten Stout Beer, Oats and Molasses

 What do you need
•    500g/17oz. good quality – organic wholemeal wheat or spelt flour
•    1/2 cup / 4oz.rolled oats
•    2 teaspoons of baking soda
•    1 teaspoon of sea salt
•    3 teaspoons of molasses
•    200ml/6.7 oz  stout beer and 200 ml/6.7 oz live yoghurt
•    some extra flour to dust

Method

  • Preheat your oven to 190C/375F
  • Line a baking tray with greaseproof paper
  • Combine the flour, baking soda and salt well in a bowl.
  • Add yoghurt and stout and mix with the dry ingredients.
  • Quickly form a wet dough – it is important to get the bread in the oven as quickly as possible and not to overwork it – if the dough is too wet dust with flour until you can shape it.
  • Dust it with flour and cut a cross in the dough half way down the dough.
  • Put on the baking tray in the middle of the oven for 40 minutes.
  • The bread is ready when it makes a hollow sound when you knock on the bottom.
  • Cool on a wire rack

I like to place a small container of water with the bread in the oven, the moisture will help the bread get a tender crumb.
Best eaten when still slightly warm, spread with butter and with a piece of bitter dark chocolate …

The Irish Times pub in Antwerp, is no longer. There had been an Irish pub on this site since the 40’s

You might also like
Soda bread – a loaf in 45 minutes

Filed Under: Bread, Uncategorized Tagged With: baking, beer, bread, Irish food, recipes, soda bread, stout

Poverty and oysters … Beef, stout and oyster pie

4th March 2013 by Regula 10 Comments

As Dickens’ Sam Weller remarks in the Pickwick papers:

‘Poverty and oysters always seem to go together’.

Oysters have been savoured in Britain since Roman times. Shells have been found at many archaeological sites, with the Roman fort and Amphitheatre in Richborough as the most symbolically important one, and stretching as far north as Hadrian’s and the Antonine walls. Before the Romans came, the Britons regarded shellfish as something to eat when there was no fish or meat to be had. The little molluscs weren’t sought after until the Romans started to farm them and even export them live to Rome, where they were considered a delicacy.

When the Romans withdrew and the Saxons invaded in the 5th century, so a rich culinary culture disappeared, which included the oyster farming. It would take centuries for the oyster to become popular again and the first recorded appearance is to be found in a 14th century cookery manuscript by the Master Chef of King Richard II.

Throughout
the Medieval period the church imposed a number of days where one
should eat fish rather than meat. In fact, for a third of the year,
eating meat was forbidden. Therefore the mixing of fish and meat in
dishes only became popular later in the 16th century and an early 17th
century cookbook gives the recipe for roasting mutton with oysters.

By the end of the 18th century the industry had become highly regulated and although oysters had been the delight of the rich for a very long time, industrialisation cheapened them, making oysters one of the staples of the diet of the poor.

Beef
and oyster pie is a classic Victorian dish; it was the food of the
poor, and the poorer you were the more oysters you would put in your
pie. Oysters were plenty, the smaller ones sold as fast food on the
streets of London or pickled to keep, while the bigger ones were put in
stews and pies to make up for the deficiency of meat. It was a cheap
source of protein.

Oysters were also a typical food to be found
in public houses, where they were most commonly served with a pint of
stout. Stout beers were popular because of their strong flavour, higher
alcohol content, longer shelf life and because they were cheaper than
other beers. The claims of Stout being a nutritious drink made the
pairing with oysters the perfect cheap meal for the working class on
their way home with their wages.

Demand for oysters was high,
with as many as 80 million oysters a year being transported from
Whitstable’s nutrient-rich waters to London’s Billingsgate Market alone.
In the middle of the 19th century the natural oyster beds became
exhausted in England. As the oyster beds further declined, what had
previously been the food of the poor became a delicacy for the upper
classes once again.

This pie is wonderfully succulent; once a poor man’s dinner, it now graces our tables with elegance. The beef, oyster and stout or porter beer are a perfect pairing together with a rich suet crust – just like your nan used to make but let’s kick it up a notch and put some effort into the decoration of the pie! It’s fun to let your children have a go with the leftover pastry; you will have leftover with this recipe. Keep in the freezer until needed, defrost the evening before in your fridge.
This recipe works just as good as a stew, feeding 4 hungry mouths.

What do you need
For the stew

  • 1 large carrot, quartered and cut into 2 cm long pieces
  • 3 medium onions
  • 500 g chuck of beef, diced
  • flour to dust the meat
  • 1 pint of stout, Guinness or porter beer
  • 1 teaspoon of mushroom ketchup (if you don’t have it, leave it out or use 1 teaspoon balsamic vinegar)
  • 2 bay leaf
  • thyme
  • pepper and salt to season
  • water
  • 6 oysters, cleaned.

For the pastry

  • 300g plain white flour
  • 100g unsalted butter
  • 100g Atora shredded suet
  • a generous pinch of salt
  • 125 ml icecold water
  • 1 egg, beaten

Method
for the stew – filling

  • Preheat your oven to 160C
  • Add the carrots and onion to a cast iron casserole and color them over a medium fire.
  • Dust the meat with the flour and add it to the vegetables.
  • Immediately pour in the stout, mushroom vinegar and herbs.
    If the meat isn’t completely covered in liquid, add some water or extra stout until it’s just covered.
  • Bring to the boil without putting on the lid.
  • When boiling, put on the lid and place in a lower part of the oven for 3-3,5 hours.
    It depends on the animal used, the quality of the meat and how lean it is to know when the meat will be done. Check on it regularly so you don’t end up with dry meat. The meat is done when it is about to fall apart.

    for the pastry lid

  • Combine the flour, butter, suet and salt in a large mixing bowl and use your fingers to rub the butter into the flour. Keep on doing this until the mixture resembles breadcrumbs.
  • Pour in the water and start pressing the liquid into the breadcrumb-like mixture. Be gentle as you must be careful not to overwork the dough.
  • When you have created a rough dough, wrap it in cling film and let it rest in the fridge for an hour or more. You can prepare the pastry the day before if you’re feeling organized.
  • Preheat your oven to 180C
  • Ladle the stew into your shallow pie dish and place the oysters neatly so everyone will find some in his plate.
  • Use the beaten egg to eggwash the edges of the piedish.
  • Take your pastry out of the fridge and place it on a floured work surface. Now roll out the pastry about 1 cm thick and make sure it’s larger than your pie dish.
  • Now carefully pick up the pastry and place it over the pie dish. Trim off the edges of the pastry so you get a nice lid. Now crimp the edges by using your thumb or a fork so the pastry lid is closed tightly.
  • Decorate the pie lid if you like and eggwash generously before putting into the oven on one of the lower parts.
  • The pie should be nice and golden after 40-45 minutes.Serve with peas and carrots because you got to have peas and carrots with pie …

You might also like
Sussex stewed steak >
Jo’s Hotpot >
Chicken & taragon pie >

Filed Under: Fish, Food & Social history, Main dishes, Meat, traditional British mains, Uncategorized Tagged With: beef, beer, British food, Food history, Kent, main, oyster, pastry, porter, recipes, savoury pie, stout, Victorian

Next Page »

Primary Sidebar

Follow Us

  • Twitter
  • Facebook
  • Instagram
  • Pinterest
  • Email

Subscribe

My Books: Pride and Pudding

My Books: Pride and Pudding

The Official Downton Abbey Christmas Cookbook

test

Oats in the North, Wheat from the South

Oats in the North, Wheat from the South

The National Trust Book of Puddings

The National Trust Book of Puddings

Brits Bakboek (British Baking)

Brits Bakboek (British Baking)

Belgian Cafe Culture

Belgian Cafe Culture

Check out my husband’s ART

Check out my husband’s ART

Meet Regula

Meet Regula

Footer

Connect

Regula Ysewijn is a food writer, stylist and photographer, with a particular interest in historical recipes. he is a Great Taste Awards judge and a member of The Guild of Food Writers, as well as one of the two judges on 'Bake Off Vlaanderen', the Belgian version of 'The Great British Bake-Off'. A self-confessed Anglophile, she collects old British cookbooks and culinary equipment in order to help with her research. She is the author of 5 books: Pride and Pudding the history of British puddings savoury and sweet, Belgian Café Culture, the National Trust Book of Puddings, Brits Bakboek and Oats in the North, Wheat from the South. Read More…

  • Bloglovin
  • Facebook
  • Google+
  • Instagram
  • Pinterest
  • RSS
  • Twitter
Deprecated: genesis_footer_creds_text is deprecated since version 3.1.0! Use genesis_pre_get_option_footer_text instead. This filter is no longer supported. You can now modify your footer text using the Theme Settings. in /customers/6/8/f/missfoodwise.com/httpd.www/wp-includes/functions.php on line 5698

Copyright © 2022 · Foodie Pro Theme by Shay Bocks · Built on the Genesis Framework · Powered by WordPress